Posted on

Microbiology: Negative stains, part 3.

Negative stains: uses an acidic stain like India ink or nigrosin. The anionic chromogen properties of the stain will not penetrate the cell/organism thereby staining the “background” (negative space around the cell/organism) instead. Heat fixing is not required so beware that the organisms/bacteria are NOT killed. Aseptic technique and proper disposal is important.

Clinical significance. Helpful in detecting spirochetes (difficult to stain), presence of a capsule or spore. Helps identify infectious agents such as fungi from bird droppings.

Summary of procedure.

  1. Place a drop of India ink or nigrosin on one end of a clean slide.
  2. Use a loopful of inoculated broth and mix it well with the drop of stain on the slide.
  3. Place the short edge of another slide at a 45 degree slant against the spot of stain. Drag this second slide across the original slide (smearing the drop across).

Reference

Cappuccino, J. G., & Welsh, C. (2018). Microbiology: A laboratory manual.
Posted on

Microbiology: Simple stains, part 2.

Simple stains: uses a single reagent (as opposed to multiple/contrasting reagents) to help distinguish between the organism and its background via boosting the contrast. Simple/basic stains help us to observe the morphological characteristics. Examples of simple stains: methylene blue, crystal violet, carbol fuchsin.

Clinical significance. Relatively quick and easily performed staining technique that aids in basic identification via morphological characteristics. Also helps to estimate the prevalence/proliferation of the organism.

Summary of procedure.

  1. Using aseptic technique at all times, prepare a smear & heat fix.
  2. Flood slide with
    Methylene blue for 1-2 minutes, or
    Crystal violet for 20-60 seconds, or
    Carbol fuchsin for 15-30 seconds.
  3. Using a bottle of deionized water, gently rinse the slide while holding the slide parallel to the stream of water.
  4. Very very gently blot (not wipe) slide using bibulous paper.

Reference

Cappuccino, J. G., & Welsh, C. (2018). Microbiology: A laboratory manual.
Posted on

Microbiology: Stains, part 1.

A stain is an organic compound composed of:

  • Benzene ring: organic colorless solvent.
  • Chromophore: the color component.
  • Chromogen = benzene component + chromophore component.
  • Auxochrome: helps to modify the chromophore’s ability to absorb light; and modifies the chromogen (ionization) to help it bind to tissue/fibers.

Acidic stains: Sodium, potassium, calcium or ammonium salts ionize such that chromogen has anionic properties and has affinity for the “positive” components of a cell (e.g. picric acid).

Basic stains: Chlorides or sulfate salts of colored bases ionize such that chromogen has cationic properties and has affinity for the “negative” components of a cell (methylene blue).

Differential stains: are more complex, use 2 contrasting stains, and help to separate organisms/cells; and/or help to visualize structures such as flagella, capsule, spore, or nucleus.

Reference

Cappuccino, J. G., & Welsh, C. (2018). Microbiology: A laboratory manual.
Posted on

Microbiology: Basic media/medium for growing cultures.

In order to grow organisms, you need to provide an adequate environment suitable for their growth.

Things to consider are (but not limited to):

  • Temperature. Does it grow best at room temperature or in an incubator?
  • Aerobic, anaerobic, and everything inbetween.
  • Acidity.
  • Room to grow. You need to provide enough space for your organism to grow.
  • Nutrients.

Consider your culture medium—basic building block nutrients for your organism to grow.

A broth medium is a liquid nutrient environment. It is good for growing a large number of organisms in a limited volume (generally a test tube size). A loop is usually sufficient to inoculate the broth. Visually (naked eye) examine the sterile broth. Note it’s opacity and viscosity. After inoculation (and after adequate growth time), note the broth’s opacity. You should be able to notice a difference—usually a “clouded” effect; particulates; maybe color change at the surface or bottom of a tube; and opacity.

An agar medium is a semisolid (.ess than 1% agar) to solid medium (1.5-1.8% agar) suitable for a slant test tube, deep test tube, or plate. Agar comes from seaweed and contains galactose (no real nutritional value). One can mix in different nutrients (whatever you need for a task) into the agar base. Agar is liquid at 100 °C and solidifies at 40 °C.

Reference

Cappuccino, J. G., & Welsh, C. (2018). Microbiology: A laboratory manual.
Posted on

Microbiology: Getting started talking about cultures.

Let’s get started talking about cultures.

Pure culture: a culture that contains or is made up of a single species of microorganism.

Colony: a growth cluster of a single species of microorganism.

Subculturing: taking a sample of a pure culture and making (inoculating) a new culture. This is important so that you can make an ample supply of working cultures.

Cultural characteristics: these are macroscopic (i.e. seen by the naked eye) characteristics observed. Sometimes the word “morphology” is used when describing the form of things. Click here to download forms I made to help notate observations.

Working culture: is basically a “stock” culture, one that you can use or sample from without contaminating the originals. It’s always wise to maintain a few working cultures via subculturing, especially if you have a very lengthy project.

Reference

Cappuccino, J. G., & Welsh, C. (2018). Microbiology: A laboratory manual.
Posted on

Microbiology: Methyl red test.

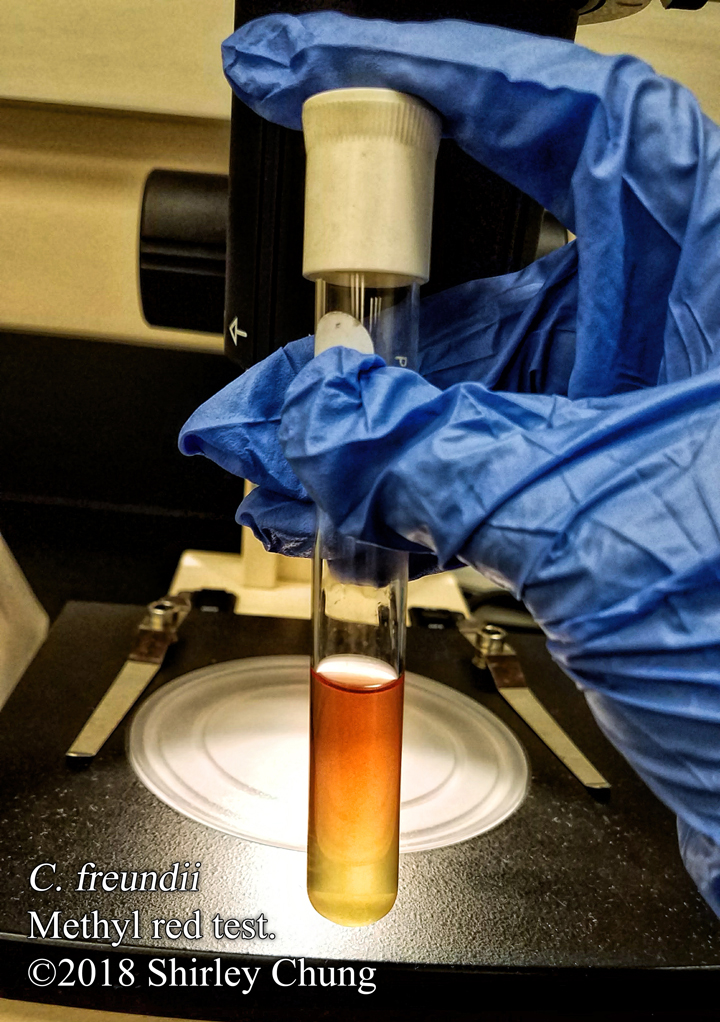
Methyl Red Test (Cappuccino & Welsh, 2017).

Description. The Methyl Red test is used to see if organisms can ferment glucose and if the stabilized end-products are acidic (positive test if the methyl red indicator turns red in the inoculated medium) (Cappuccino & Welsh, 2017). The indicator turns yellow (negative) if the medium is more alkaline. It is part of the IMViC test series.

Clinical significance. The Methyl Red test is useful in differentiating between E. coli and E. aerogenes (Microbe Online, 2014).

Summary of main steps. It is assumed that the reader knows aseptic technique and basic inoculation.

  1. Using aseptic technique, inoculate a methyl red broth tube (MR-VP because it is the same medium used for the Voges-Proskauer test).
  2. Incubate at 37°C for 24-48 hours.
  3. Add 5 drops of methyl red indicator and gently agitate the tube. Wait a few minutes. Observe results.

Reference

Cappuccino, J. G., & Welsh, C. (2018). Microbiology: A laboratory manual.
Microbe Online. (2014, January 24). Methyl red (MR) test: Principle, procedure and results. Retrieved from https://microbeonline.com/methyl-red-mr-test-principle-procedure-results/

Posted on

Microbiology: Citrate test.

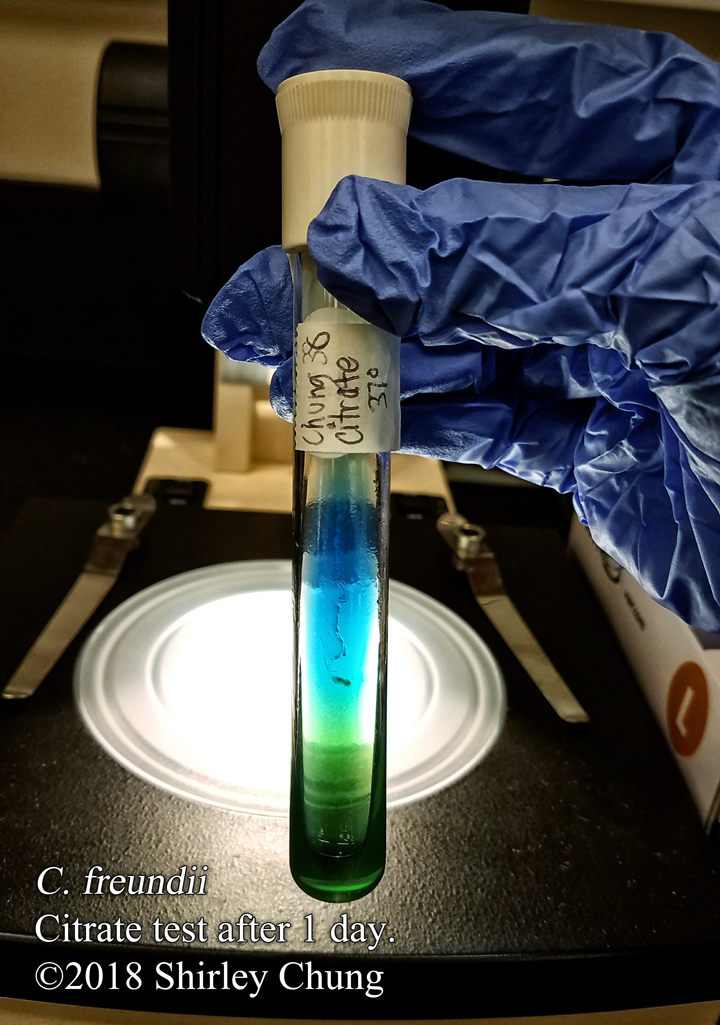
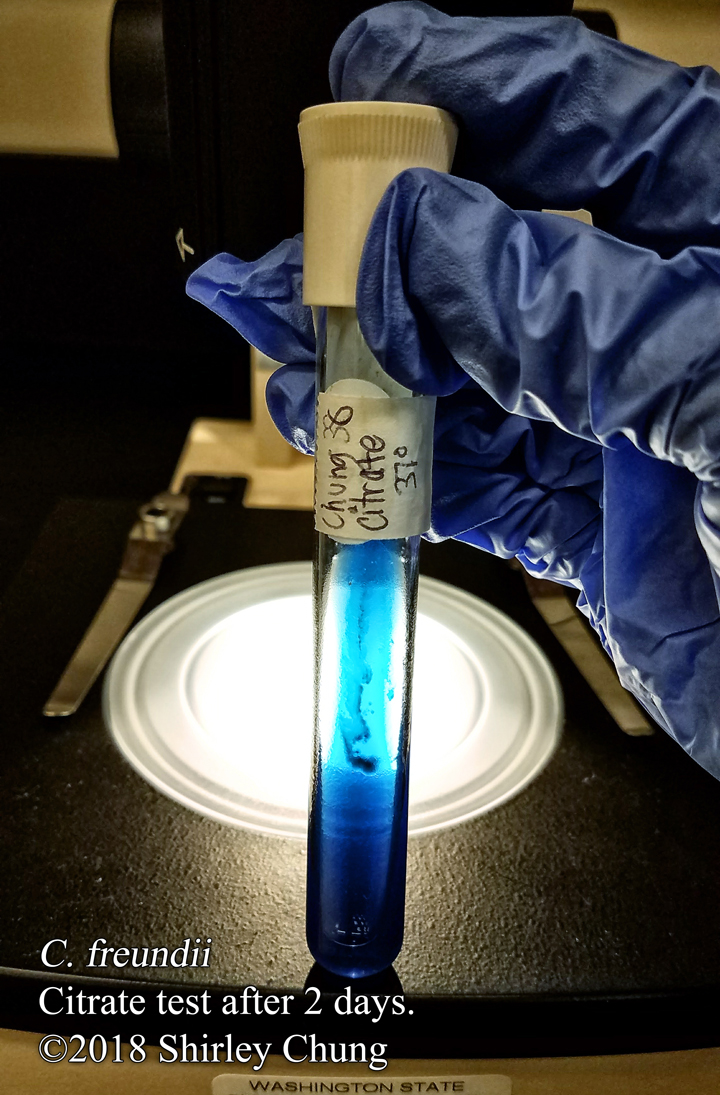
Citrate Test (Cappuccino & Welsh, 2017).

Description. Simmons citrate agar containing pH bromthymol blue indicator changes from green (prior to inoculation) to blue in the presence of alkaline sodium carbonate (formed from sodium, water and carbon dioxide from the metabolism path of citrate) (Cappuccino & Welsh, 2017).

Clinical significance. The Citrate test is part of the IMViC tests which help to differentiate Enterobacteriaceae (Microbugz Austin Community College, n.d.).

Summary of main steps. It is assumed that the reader knows aseptic technique and basic inoculation.

  1. Using aseptic technique, inoculate a Simmons citrate agar slant.
  2. Incubate at 37°C for 24-48 hours. Observe results.

Reference

Cappuccino, J. G., & Welsh, C. (2018). Microbiology: A laboratory manual.
Microbugz Austin Community College. (n.d.). Welcome to Microbugz – Citrate Test. Retrieved from http://www.austincc.edu/microbugz/citrate_test.php

Posted on

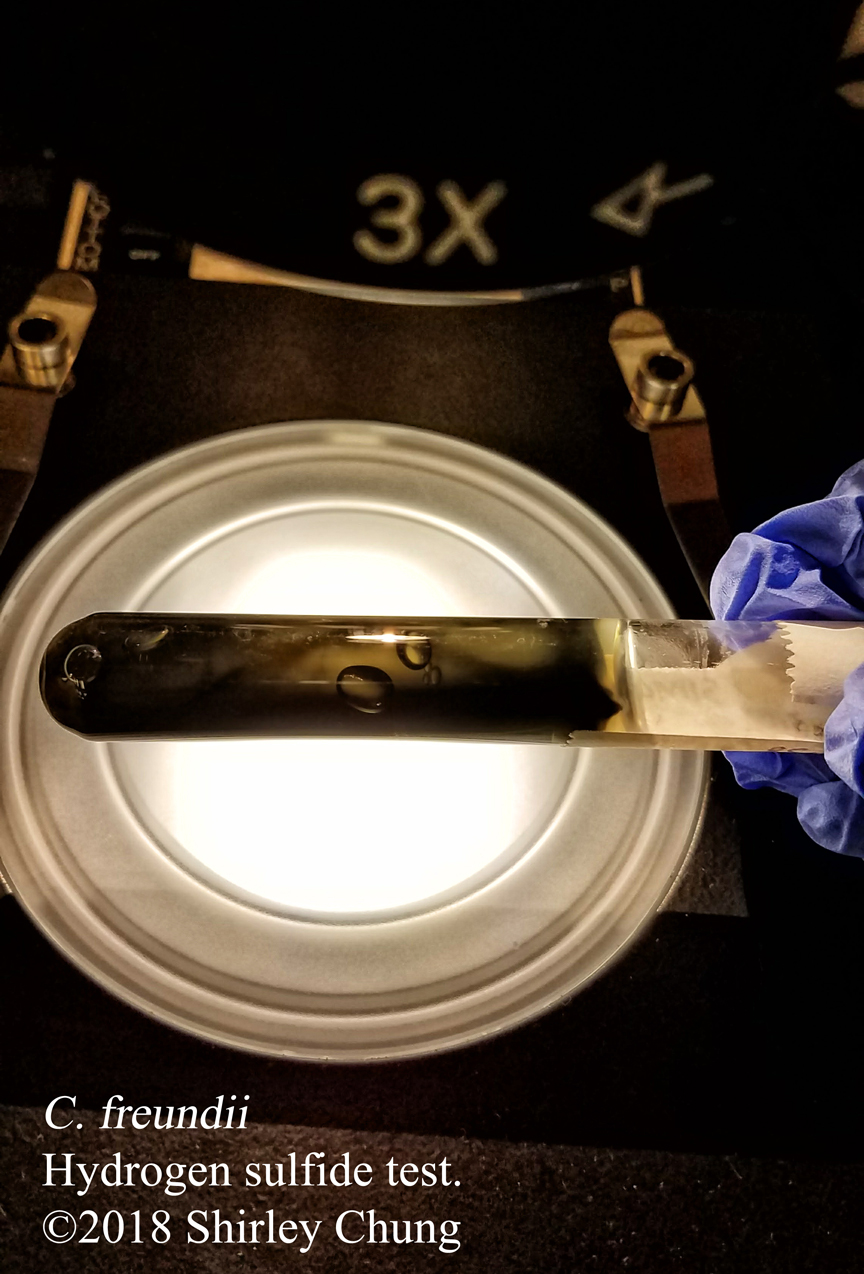
Microbiology: Hydrogen sulfide test.

Hydrogen Sulfide Test (Cappuccino & Welsh, 2017).

Description. Some bacteria are able to reduce organic/inorganic sulfur sources (e.g. cysteine, thiosulfate) into hydrogen sulfide, H2S. The ferrous ammonium sulfate in the SIM agar (also containing peptone and sodium thiosulfate as substrates in the reduction/hydrogenation of sulfur) deep medium acts as an indicator by forming black precipitate (positive result) in the presence of H2S gas (Cappuccino & Welsh, 2017). The black precipitate “trail” also allows for observation of bacterial motility.

Clinical significance. The Hydrogen Sulfide test helps to separate Proteus/Salmonella (able to metabolize sulfur) from Shigella dysentariae (unable to metabolize sulfur).

Summary of main steps. It is assumed that the reader knows aseptic technique and basic inoculation.

  1. Using aseptic technique and a transfer needle, inoculate a SIM agar deep tube via straight-line stab.
  2. Incubate tube at 37°C for 24-28 hours. Observe results.

Reference

Cappuccino, J. G., & Welsh, C. (2018). Microbiology: A laboratory manual.
Posted on

Microbiology: Carbohydrate fermentation tests.

Carbohydrate Fermentation Tests (Cappuccino & Welsh, 2017).

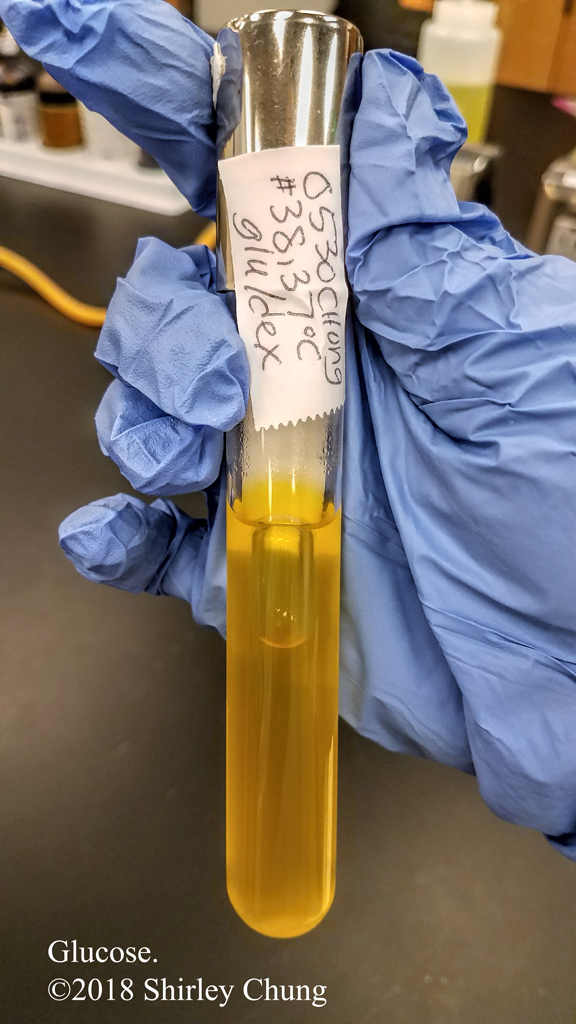
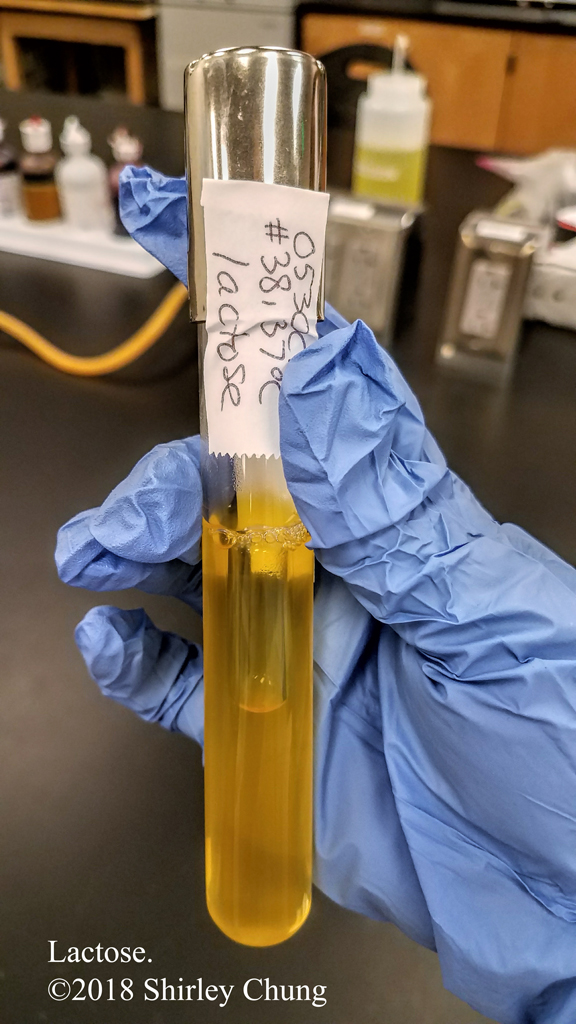
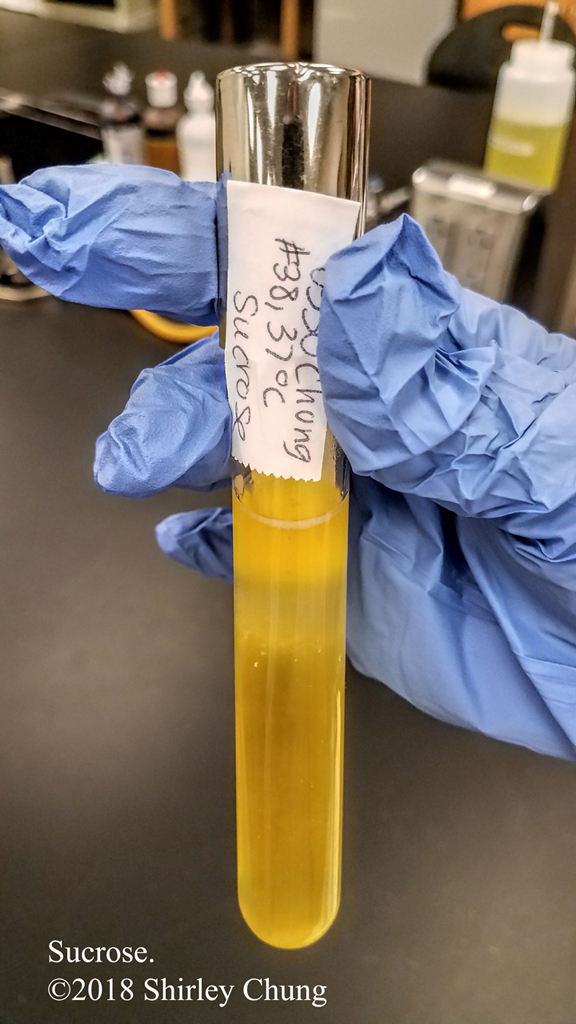
Description. Different bacteria have different carbohydrate fermenting profiles. The series of three carbohydrate fermentation tests demonstrate an organism’s ability to ferment dextrose (glucose), lactose, and sucrose with the production of acidic waste-products and/or carbon dioxide gas (observable via Durham tube inserted upside-down in the sugar broth medium). Facultative anaerobes usually are able to ferment at least one carbohydrate. Carbohydrate broths prior to inoculation are reddish. After inoculation (and incubation) the phenol red pH indicator in the medium turns yellow (positive) if acidic waste-products were produced from carbohydrate fermentation (Cappuccino & Welsh, 2017). A gas bubble may or may not appear in the Durham tube as well.

Clinical significance. The carbohydrate fermentation profile can help in identifying pathogens. For example, lactose fermentation is characteristic of Citrobacter, Escherichia, Enterobacter, and Klebsiella (Microbe Online, 2013).

Summary of main steps. It is assumed that the reader knows aseptic technique and basic inoculation.

  1. Be sure the correctly label the carbohydrate broth tubes as they all look the same initially. Use aseptic technique throughout.
  2. Inoculate each carbohydrate broth with one loopful of bacterial broth culture.
  3. Incubate all tubes at 37°C for 24-48 hours. Observe results.

The following photos are the results for C. freundii.

Reference

Cappuccino, J. G., & Welsh, C. (2018). Microbiology: A laboratory manual.
Microbe Online. (2013, October 1). Enterobacteriaceae family: Common characteristics. Retrieved from http://microbeonline.com/seven-common-characteristics-family-enterobacteriaceae/

Posted on

Microbiology: MacConkey agar.

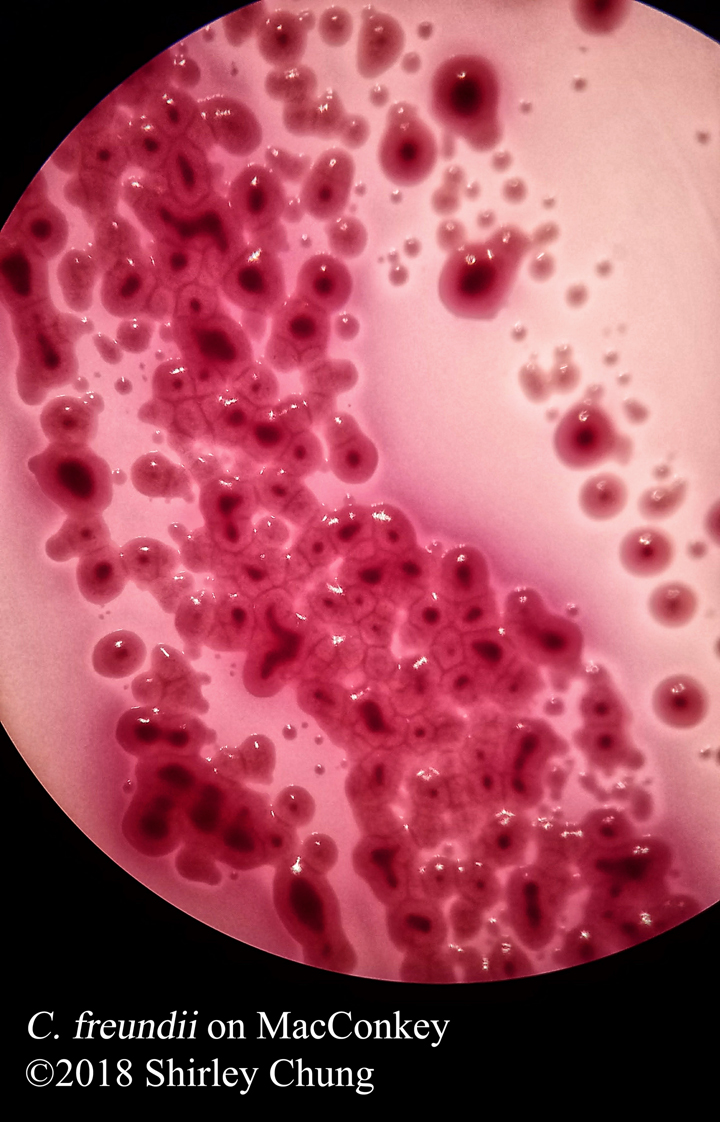
MacConkey Agar (Cappuccino & Welsh, 2017).

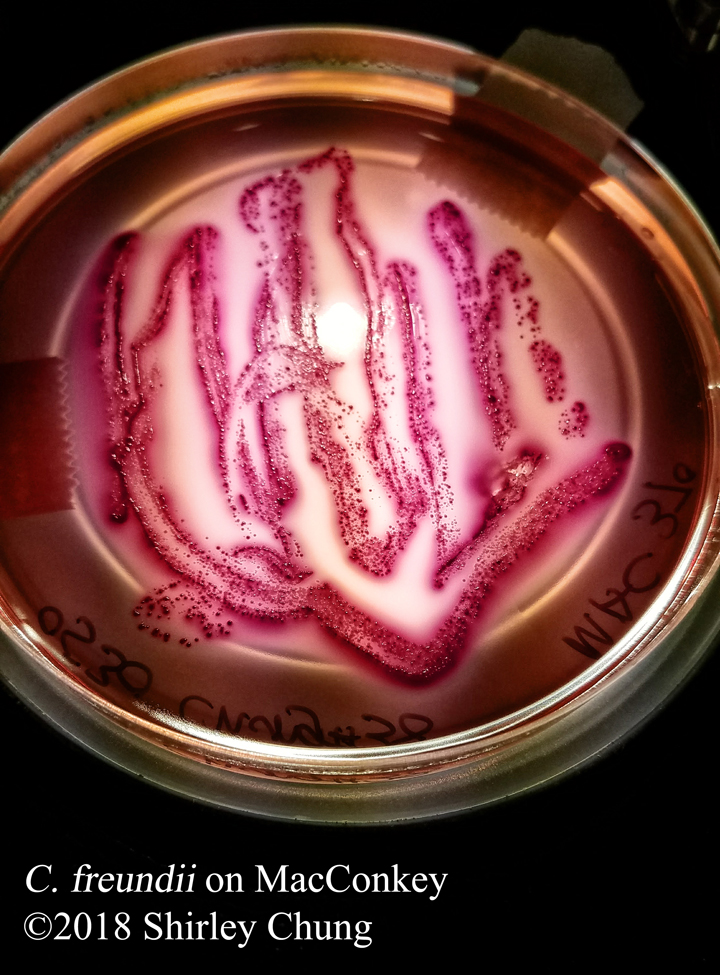
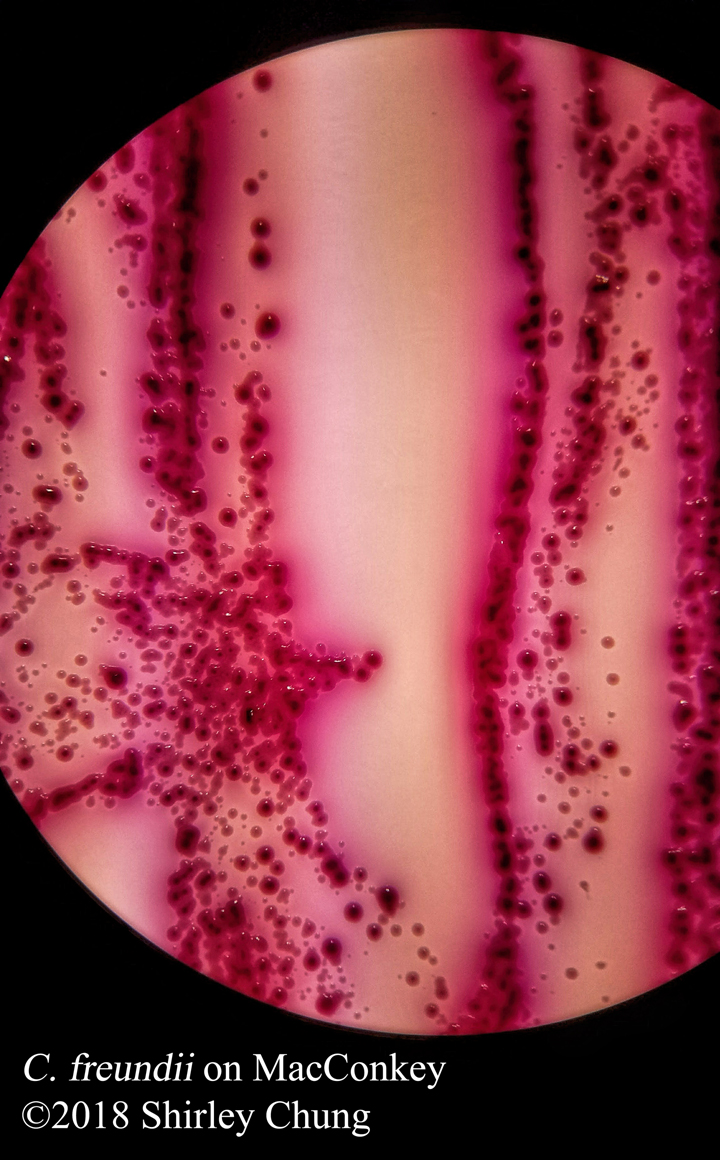
Description. MacConkey agar is selective and differential medium. It is selective for gram-negative bacteria as crystal violet (in MacConkey) inhibits gram-positive organisms. Lactose, bile salts, and pH indicator neutral red in MacConkey agar allow differentiation between coliform bacilli (lactose fermentation produces acidic end-products indicated by red-colored growth and pink medium surrounding growth) and dysentery/typhoid/paratyphoid bacilli (non-lactose fermenters, no acidic end-products, appear tan/clear).

Clinical significance. MacConkey can help differentiate between gram-negative and gram-positive bacteria when trying to culture a pathogen from a wound sample.

Summary of main steps. It is assumed that the reader knows aseptic technique and basic inoculation.

  1. Using aseptic technique, inoculate a MacConkey agar plate.
  2. Incubate inverted plate (lid on bottom) at 37°C for 24-48 hours.
  3. Observe growth.

Reference

Cappuccino, J. G., & Welsh, C. (2018). Microbiology: A laboratory manual.