Posted on

Behind the Scenes: 2019 Artist’s Card Deck

Happy New Year 2020! I’m so excited to bring you the first “Behind the Scenes”–the making of my 2019 Artist’s Card Deck.

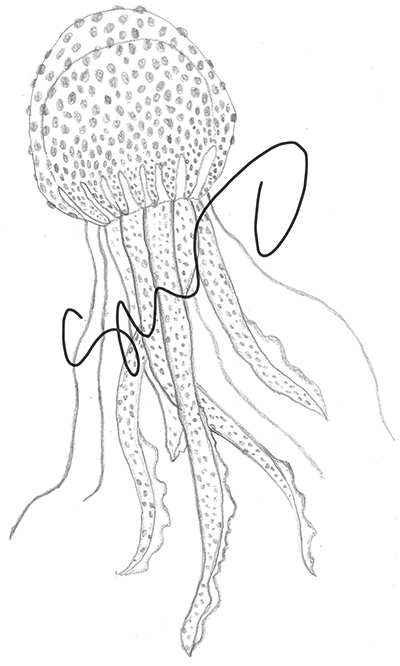
The 2019 artist card deck was inspired by the beauty of the oceans and beaches. All of my work starts with pencil, paper, and a lightbox. The next step is to scan them into the computer and further manipulate line and color. I’ll even scan in different elements that have been penciled separately, then use the computer to arrange them. The “Jellyfish” is an example of that technique. Typically, I do not do a lot of “clean-up” like some “Disney-styles” are like. I like how my lines are expressive, dynamic, organic, and textural. Sometimes, I’ll even “dirty” things up to add even more texture. I embrace a very textural approach in layers.

Check out the thumbnails below. Click on them and they’ll open up bigger.

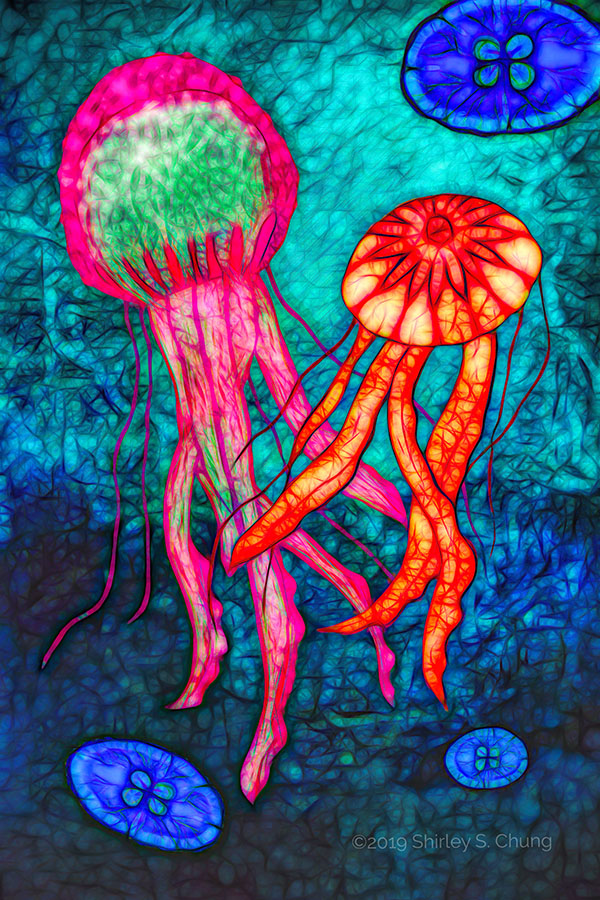
Rough colors are sometimes blocked in using traditional media like colored pencils, ink/watercolor washes, and markers. I use that as a base, scan that into the computer, and then use digital coloring from there with various painting programs.

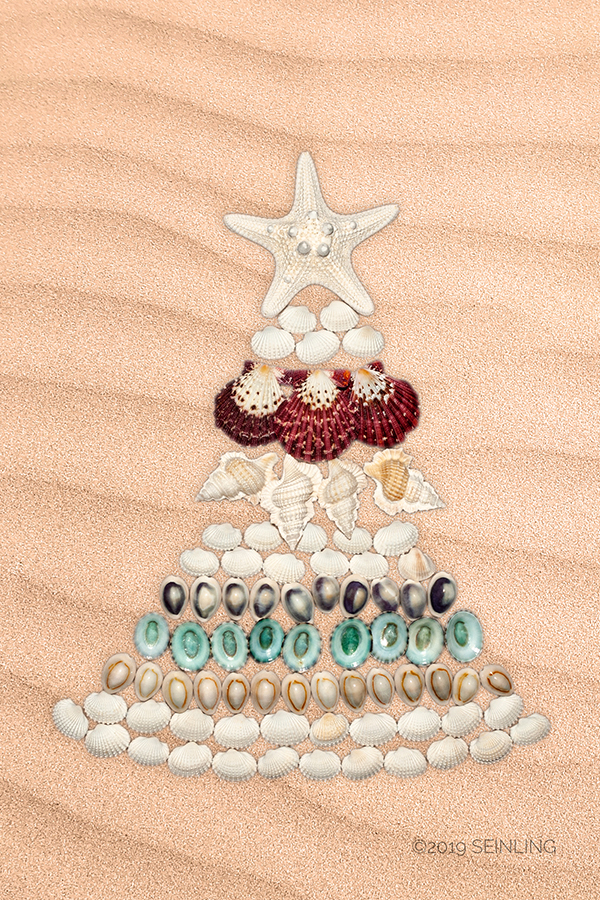
“The Shell Tree”. I love seashells! I arranged a variety of shells on a matte black presentation cardboard. I lit the scene left and right to try create the most even lighting (reduce the amount of shadows) for overhead shooting. I used my DSLR to shoot from directly above—no flash. In Photoshop, I had to mask (paint out) the black background so that it became transparent. Then I used a sand-background behind my seashell layer. It was extremely challenging because the seashells had all these little bumps, nooks and crannies that “caught” the black background. I had to zoom-in and do some detailed hand-work on that around all those edges.

The final images were sent out to a lab for special printing on Kodak ENDURA Metallic paper which makes the colors pop and gives the picture a rich, vibrant sheen.

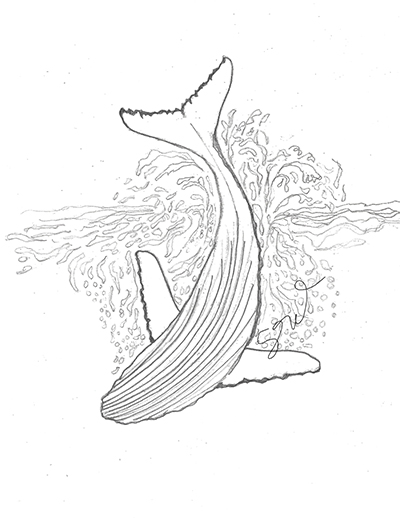
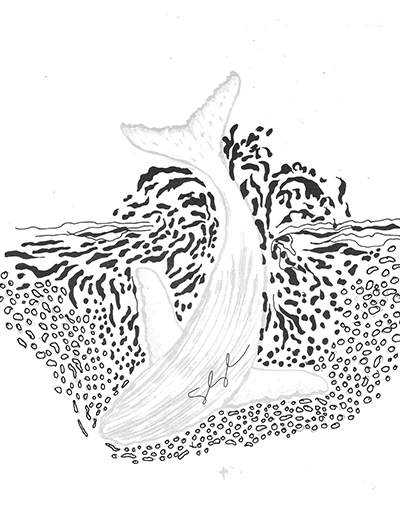
A few people received a C-Print this year (it is more costly to produce)—Digital Chromogenic C-Print (Silver Halide). A second version of the humpback whale print was made by RGB lasers projecting the digital image onto special paper. This exposure causes chemical reactions in the paper producing: smooth color gradients (“dotless”); rich color; preserving the highest levels of detail in the print.

My dream is to relocate to Hawaii and New Zealand and be surrounded by their natural wonders. To learn more, visit my website and follow me. I am developing instructionals, tips, product reviews, FREEBIES and more! In January, I’ll reveal the start of my tropical flowers & plants series. Follow along, and do art with me!

Posted on

Favorite Products

(In Progress. Last edited 09.19.2019)

Graphite Pencils

When I’m in a pinch, even a normal yellow school pencil will do. However, it is nice to have a range of pencils with different hardness/softness of graphite lead. Drawing pencils tend to have a larger graphite core as opposed to normal pencils. The “H” rating stands for hardness—a higher number means harder graphite. Harder graphite is great for technical drawing or in cases where it is important to have a really clean line. The “B” rating is for blackness and these are generally softer pencils—a higher number means a softer and blacker graphite lead. These are great for shading. I recommend getting a few in each HB range to try. In the long run, you may find that you favor certain ones.

Graphite sticks and woodless pencils are also really nice to have. They allow you to experiment with different edges and edge-shapes.

This is a great link about the HB scale, https://pencils.com/pages/hb-graphite-grading-scale

Water Soluble Pencils/Graphite/Pigment Sticks & Watercolors

  • Coming soon!

Multiliner Markers

After penciling my sketches, I clean them up a little and ink them—old school all the way. I leave a lot of my initial penciling and marks because the lines are dynamic and expressive. I am not a “super clean up” artist (which is required for animation styles such as Disney and Japanese manga). As a kinesthetic learner, I prefer traditional media to get my ideas down.

For outlining, it is important that that the markers write smoothly/consistently and glide across the page effortlessly. You pay a higher price for tips that last longer. The very very fine tips for detail work wear out the fastest. Try keep your hand relaxed as you ink so that you don’t crush the tips into the page. Also I don’t like markers that bleed a lot. You don’t want your outlines to bleed and be fuzzy. It is worth the money to invest in your liner/multiliner markers.

Copic Multiliner SP’s have an aluminum body. They are excellent. They are the refillable and the tips are replaceable. You can buy them from Amazon, Michaels, and other stores. My preferred art supply stores are Dick Blick and Utretcht.

Sakura Pigma Micron is another good brand of liner markers. They are great to start out with and more budget friendly. You can find these in many stores. They are disposable. The finer tips may clog now and then. You also have to be careful not to smash the superfine tips.

General Markers

Paper

There are different papers for different purposes. Paper choice is especially important for watercolor and pastel painting.

  • General sketchcing/drawing. Canson and Strathmore are my go-to’s. If you’re starting out, the student/recycled grade is fine.
  • Marker paper. Bienfang, Copic.


Pastels

  • Coming soon!