Posted on

Major Die Brands

Shopping for metal dies for your die cutter can be costly. I’ve been taking notes on major die brands, and trying to shop for the best price at (but not limited to): Joann’s, Amazon, Ebay, etc. Here’s my running list so far. Not all brands have a website.

Amy Design

Angela Poole, https://www.angelapoole.co.uk/

Avery Elle, https://www.averyelle.com/

Birch Press, https://birchpressdesign.com/

BoBunny

Card Deco

Catherine Pooler, https://www.catherinepooler.com/

Cheery Lynn Designs

Concord & 9th, https://concordand9th.com/

Creative Expressions

Dee’s Distinctively

Die-Namites

Dies R Us, https://www.diesrus.com/

Doodlebug

Dress My Craft, https://www.dressmycraft.com/

Elizabeth Craft Designs, https://www.elizabethcraftdesigns.com/

Fairy Cuts

Frantic Stamper, https://www.franticstamper.com/

Gemini Dies

Hampton Art

Hero Arts, https://heroarts.com/

Impression Obsession, https://www.iostamps.com/ 

Jeanine’s Art

Jillibean Soup

Karen Burniston, https://karenburniston.com/

Lady E Design, https://www.ladyedesign.com/

Lawn Fawn, https://www.lawnfawn.com/

Little B

Magnolia, https://www.magnolia.website/

Mama Elephant, https://mamaelephant.com/

Memory Box, https://www.memoryboxco.com/

Neat & Tangled

Paper Rose, https://paperrose.com.au/

Paper Smooches

Penny Black, http://pennyblackinc.com/

PhotoPlay, https://photoplaypaper.com/

Poppystamps, https://www.poppystamps.com/

Precious Marieke

Prima Marketing, https://www.primamarketinginc.com/

Quickutz

Serendipity

Sizzix, https://www.sizzix.com/

Spellbinders, https://www.spellbinderspaperarts.com/

Studio Light

Sue Wilson Designs

Tattered Lace, https://www.tatteredlace.co.uk/

Tim Holtz, https://timholtz.com/

Tonic Studios, https://www.tonic-studios.com/

Tutti Designs, https://tuttidesigns.com/

Uniquely Creative, https://www.uniquelycreative.com.au/

Yvonne Creations

Posted on

Tips On Drying Flowers

Download the PDF here.

Tips for drying flowers.

The key thing to ask yourself is:

Where is the moisture/water content going?

This is important for preventing rot.

Traditional pressing.

Arrange flowers on a sheet of paper. Place additional layers of papers above and below the flowers’ paper. Put a heavy object on top. The object should provide uniform distribution of weight on the stack. Good examples of weights are books, cases of soda, filing box, etc. Bad examples are a dumbbell, rock, etc.

The first 4-5 days are the most important. You’ll need to check on your flowers fairly often. You may need to transfer them to a fresh paper, and you may need to change out the stack of papers above and below. I recycle the papers—keep track of different stacks of moist papers and let them air dry for reuse.

Salt.

I tried to bury flowers/petals in salt for a few days. This works too. You need to check on your flowers/petals making sure the salt hasn’t caked on too much. Use a paint brush to dust off the salt if the salt has formed chunks from the moisture. I’ve also poured a layer of salt on a paper plate, and lay the flowers/petals on top.

Bunches of flowers.

Hanging bunches of flowers upside down is effective for sprays and bunches where the flower heads are very small. The leaves and stems make up most of their bulk. Examples are baby’s breath and chamomile.

Organize your bunches. If you bought them from a store, take the time to separate your bunches, trim the stems, and etc. It’s a lot tougher to detangle them once they are dried out. At that point, the more you disturb them, the more flower heads that you will lose.

Buds that won’t open.

For buds that won’t open on their own, you can carefully peel the covering open. Don’t wait for the bud to completely dry out, though.

Once the bud is exposed, you can try to tease it (using your fingers) into how you want the bud to look. If you want to press it, use your fingers to smoosh it kinda flat first, and then put it between sheets of papers or towels and under a heavy object (e.g. book, case of water).

The peelings may be saved and used as well. I just put them on a paper plate to air dry.

Roses.

While roses are expensive, they yield consistent results.

Don’t splurge for that perfect dozen roses. Get a spray of roses instead.

At Trader Joe’s a spray looked pretty much like a dozen, but the spray will cost you a bit less. I’m using the petals as inclusions. In fact, I may have to break the dried petal in smaller pieces. Knowing what your project requires ahead of time will help save you money.

Pluck the petals and lay them out. I used a large cardboard tray. They dry well and dry quickly. At first you wouldn’t think it, but so far I’ve found that they dry the fastest! Don’t throw away the flower core. That may be dried and used as well!

Looks like a rose.

If you encounter a flower that looks like a rose, then it is a safe bet that you can try to utilize the same processing techniques for roses.

Rose look-a-likes include (but not limited to): ranunculus, peonies, camellia, dahlia, lisianthus, begonias, double impatiens, double tulips, gardenias, and double dianthus.

I mistook the lovely lisianthus for a rose myself! They were much cheaper than roses. If you’re experimenting with techniques, then definitely go for “look-a-likes” to save money until you have your process down.

Hydrangeas.

I love hydrangeas! They’re one of my favorites. Don’t microwave hydrangeas. The results are very poor.

Instead, use the traditional method. Process hydrangeas by cutting each flower. If there are some small flowers just coming in, you may want to leave them as a two-some, three-some, or more. Place one layer’s worth of flowers on a piece of paper, and then stack a lot of papers (and/or kitchen paper towels) on top. Then place a heavy object on top—couple of books, a case of soda, etc.

I checked on them every day. You may need to transfer them to another fresh paper on days 2-4. You may also need to freshen the stacks of papers above and below them. This is to avoid rot. When it seems like they’ll stay flat on their own, you can remove them from under the weight, and leave them uncovered to dry.

I really had to pay attention to them but it was worth the effort!! They retain their beautiful color very well. Even the white hydrangeas look fantastic. They dry so beautifully and you have many options for many projects!! Hydrangeas are one of the best flowers to dry.

Oriental lilies.

Oriental lilies are super lovely! They were closed one day, and when I checked on them in the morning, they opened up completely. That was so amazing! I processed them by plucking the petals and saving the stamens and pistil.

I got good results by using multiple methods. First, I started out with traditionally pressing them between layers of paper and putting something heavy on top. Check them often for the first 4-5 days. When it seems like they will lay pretty flat on their own, just leave them out uncovered.

You may need to transfer them to another fresh paper on days 2-4. You may also need to freshen the stacks of papers above and below them. This is to avoid rot. When it seems like they’ll stay flat on their own, you can remove them from under the weight, and leave them uncovered to dry.  

Carnations and carnations look-a-likes.

For carnations and carnation look-a-likes, there are lots of options. 

You can cut the bud with a little stem and hang it to dry, lay it on a paper towel/plate to dry, press it, or use the salting methods. They require a lot of patience as they take a long time to dry.

One of my favorite processing methods is to peel back the base (keeping and drying those parts separately), then cut/pluck out all the petals to dry using traditional pressing.

Posted on

Review: Microfleur Max

When I saw Microfleur, I knew I had to try it. Microfleur is a tool for drying and pressing flowers in the microwave. It is supposed to dry and press flowers faster, and preserve more of the flower’s natural color (with less browning) as compared to traditional flower drying and pressing techniques. Traditional techniques include (but not limited to) hanging upside down or pressing flowers between stacks of newsprint/paper under a heavy object (e.g. big stack of books).

Below is a video I made, Microfleur Review. It’s expensive! Plus, it’s very difficult (i.e. not worth it) to try to return Microfleur if you don’t like the results). My next post will have tips on drying flowers.

Posted on

July 2020 Book List

Ooooh, I have some books to share (plus some books on my “check-out” list).

I just love illustration with pen, ink, and wash (watercolors, alcohol inks, gouache, etc.). Most of all my designs are nature-inspired. Although I’m using Amazon pictures and links, please know you can get these elsewhere. I just use Amazon’s book information (e.g. publishing date, ISBN, etc.).

Claudia Nice on Amazon

If you want a great place to start, check out Claudia Nice on Amazon (click here). I was searching for instruction on how to paint water, ocean, and the sea. Claudia has some great techniques. I was also looking to learn different techniques to show texture.

Alcohol Ink Techniques

Keep your eye out for this one to be released later this year. It’s on my “check out” list. https://www.amazon.com/dp/1446308340/?coliid=I2CHPU3SJ98P6W&colid=3CYQKOF7GS4PE&psc=1&ref_=lv_ov_lig_dp_it

Felting

I plan to do some felting, but I don’t just plan to make cute little animals for my e-store. I want to some “painting” with textiles. I love the thought of including different threads and ribbons.

New Techniques to Illustrate Animals and Nature

Spices, Herbs, and Cooking!!!

What?! YES!!! I want to learn about spices, herbs, and the science of cooking so that I can write in “Surf, Snow, and Sky” as well as my health and wellness site, “Integrative Wellness and Movement“. I like to make things from scratch from the best ingredients that I can source. I love the idea of farm-to-table. I want to be able to post some of my “kitchen experiments”!

Posted on

Project: True Lilies

Introduction

Lilium sp. (Plantae, Tracheophytes, Angiosperms, Monocots, Liliales, Liliaceae, Lilioideae, Lilieae, Lilium sp.).

Members of the genus Lilium. are considered “true lilies”. Other flowering plants with “lily” in their name but not from the genus Lilium are not true lilies (daylilies, peace lilies, canna lilies, water lilies, toad lilies, and calla lilies). Butterflies are attracted to lilies, but these flowers are toxic for cats and dogs. Natural pests include the lily beetle and deer. Asiatic species have some amazing and very interesting colors plus distinctive markings like spots. The Oriental species are known for their strong fragrance. Longiflorum lilies are popular during Easter.

https://youtu.be/uXzLCTgswpc
https://youtu.be/pRkEIkScE9o
https://youtu.be/g_UMewbwWdY
https://youtu.be/Pqy99gkXm1w

The Art.

Find reference photos from the internet by searching: “true lily”; “asiatic lilies”; “oriental lilies”; “aurelian lilies”; “orienpet”; “LA hybrid”; “Turk’s cap”; “Canada lilies”; “Longiflorium lilies”; etc.

How to Begin Tip.

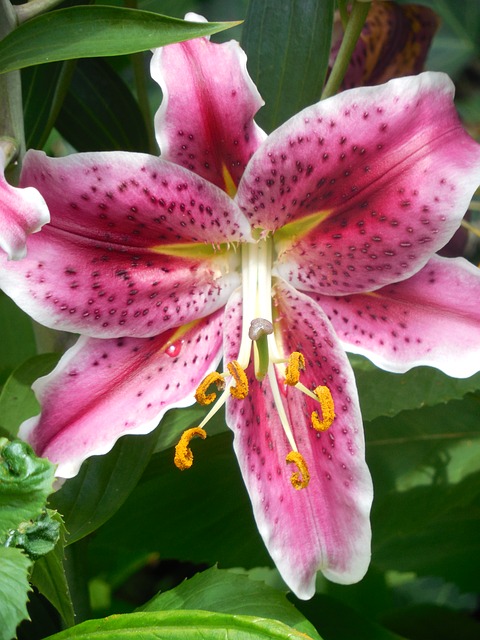
I am using the reference photo from Pixabay, https://pixabay.com/photos/asiatic-lily-lily-garden-plant-854963/ Be sure to look at lots of pictures on the internet! It’s really a blessing and such an awesome resource. Notice the patterns. Using your critical eye, notice the details, patterns, and basic geometrical shapes. Can you reduce the example below using geometric shapes? Notice the different shapes in relation to each other. Note the angle and perspective of the photo (e.g. a side view of the flower will look very different from it’s front view). There’s no real “trick” to drawing except to hone your eye–really fine tune your senses.

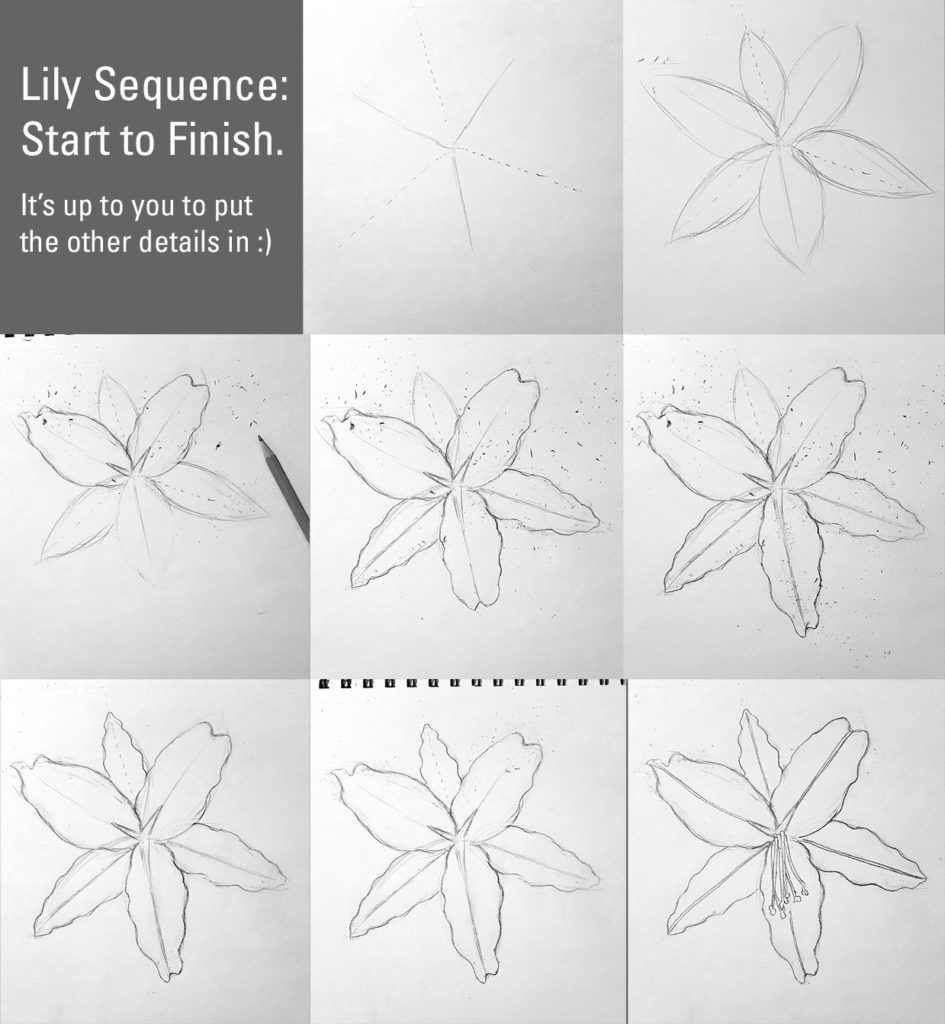
Here’s how I got started. Block things in roughly. The fun part is putting “the icing on the cake” (e.g. colors etc.)

Download these free PDF templates (free for personal use; please do not resell or repackage for sale).

Have you seen our image transfer video? If not, watch it here. It will help you with transferring the images from the template into a design/arrangement that works for you!

References

Posted on

Project: Hibiscus

Introduction

Hibiscus (Plantae, Malvales, Malvaceae, Malvoideae, Hibisceae, Hibiscus L.).

Can you believe that there are approximately 679 species of Hibiscus? Wow! Hibiscus are tropical deciduous shrubs/trees that can grow as big as 15 feet tall with 6 inch diameter flowers. Typical flower colors range from yellow, orange, to red. Hummingbirds and butterflies are attracted to these flowers.

https://www.youtube.com/watch?v=3WC4VeLzeUk
https://youtu.be/kSxRXhcm1Hw

The Art.

Goto https://pixabay.com/ and do a search for “hibiscus”. Pixabay is an excellent resource for images and vector art for personal and commercial use. Select a reference photo of the flower such as this one https://pixabay.com/photos/flower-attractions-orange-bloom-4683646/

How to Begin Tip.

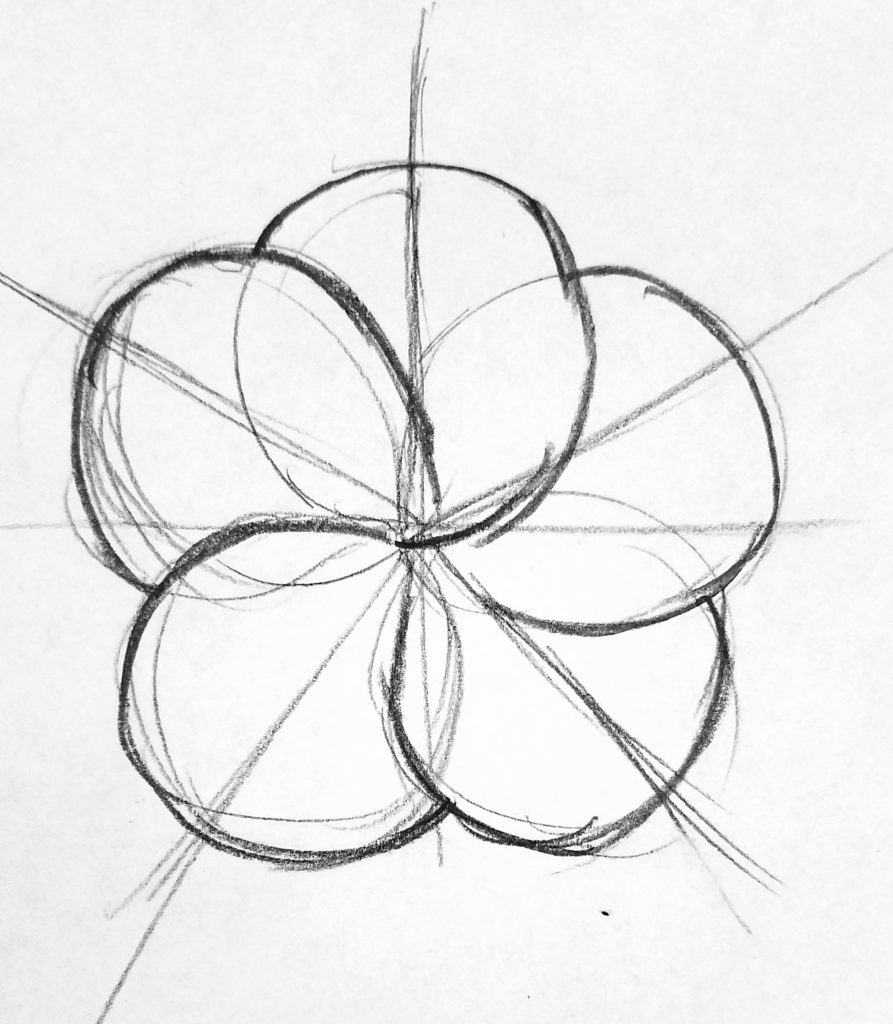
I looked at a lot of hibiscus flower pictures online because I find them so beautiful. When I begin, I try to simplify things. I noticed that they have 5 petals that are regularly spaced. If you draw a line down the middle of each petal, these “lines” would occur every 72 degrees–a circle has 360 degrees, and 360 / 5 = 72. Of course, we don’t have to be that exact. It is just useful to makes these types of observations. Then I just made a quick sketch trying to capture the basic shapes of the flower. If you look at a lot of hibiscus pictures on the Internet, you’ll notice special characteristics of different species. Start with the basic shape, and then modify it from there! Below is my quick sketch. I’ve left my construction lines (guide lines) in so that you can see.

Rough sketch with construction lines.

Download these free PDF templates (free for personal use; please do not resell or repackage for sale).

Have you seen our image transfer video? If not, watch it here. It will help you with transferring the images from the template into a design/arrangement that works for you!

References

Posted on

Project: Bird of Paradise

Introduction

Bird of Paradise (Plantae, Magnoliophyta, Liliopsida, Zingiberales, Strelitziaceae, Strelitzia).

One of the most beautiful and exotic flowering (late winter to early spring) tropical plants is the Bird of Paradise (BP), Strelitzia. There are different varieties such as the orange BP (Strelitzia reginae) and white BP (Strelitzia nicolai). Interestingly, BP is a relative to the banana plant. The BP plant grow a lot larger than most photographs show–leaves 12-18 inches which emerge from the soil (trunkless) and around 5-7 feet tall (plan for at least 8’x8′ diameter of space). You can start these plants indoors, and move them outside if needed. They like at least 6-7 hours of bright sun, heat and humidity (moist well-drained soil, not waterlogged) of a tropical climate. It takes 4-5 years for the plants to mature (keep it contained, root-drained) before they will flower–an exquisite display! This is a rhizome plant and as it ages you can divide the rhizome to repopulate. However, if you divide the rhizome, it could set back the flowering (because it will take energy for them to reestablish themselves in a new pot). Definitely see some of the references and videos.

https://youtu.be/NYSKhN2DkQc

The Art.

Goto https://pixabay.com/ and do a search for “bird of paradise”. Pixabay is an excellent resource for images and vector art for personal and commercial use. Select a reference photo of the flower such as this one https://pixabay.com/photos/flower-attractions-orange-bloom-4683646/

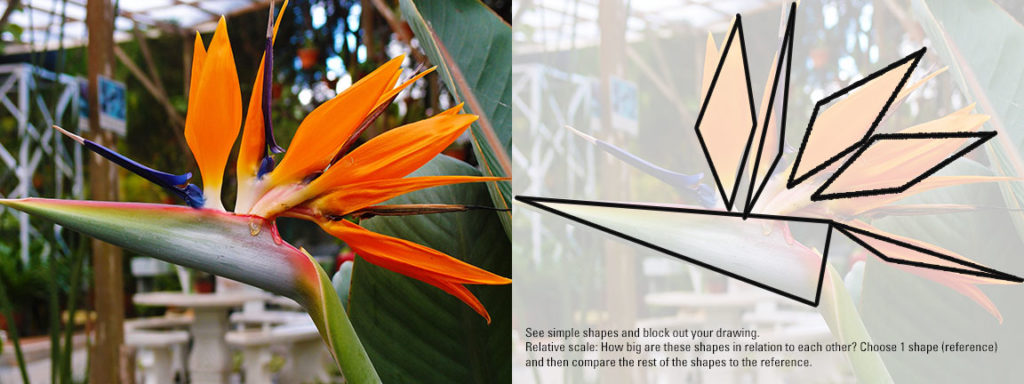
Blocking in shapes, rough draft.

Block in shapes. Look at what you want to draw. Can you simplify it into basic shapes? Pick one of your shapes to be the reference. How big/small are the other shape in relation to the reference? That will guide you in your drawing. When you start drawing your shapes, use a pencil and a light touch. Don’t go too dark in case you want to erase later.

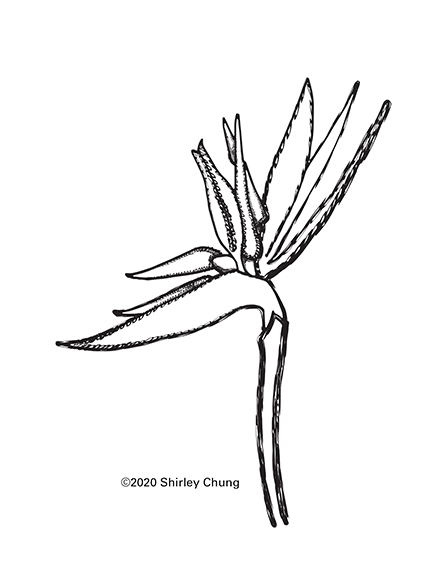
Download these free PDF templates (free for personal use; please do not resell or repackage for sale).

Transferring the template images. In the following video, I’m going to show you how to make your own transfer paper (you can also buy transfer paper in the stores called carbon or carbonless transfer paper). Remember that when you’re experimenting, use a lighter touch with your pencil. That way, if you want to change something, you can do so more easily.

Scale & Composition. Experiment with different sizes of the templates and try arranging them yourself. You can print the PDF’s smaller by adjusting the PDF/Printer Settings (those are specific to your computer setup).

Line. Be creative with your “outlines”. All the lines do NOT have to be perfect. Try a brush ink marker, or a marker that has a chisel tip (tip can make a thin line and a wide line depending on how you hold it). You can even use darker pencil lines and make it look “doodley” like this example below. There are no rules!!

Example of “doodlely lines”.

Borders. Do you ever pay attention to all those greeting cards in stores? Sometimes, a nice border brings in the composition. Experiment with different borders, different thicknesses, different shapes (e.g. rectangular, oval), and creative lines. You may use different free online draw/paint programs and make some super creative borders with leaves.

Background. Experiment with the background. Do not make the background more detailed than the foreground (flowers), because you don’t want to take the focus away from the flowers. Don’t make the background colors too contrasty. Try subtle different shades of green, blue, or perhaps a muted/duller color that is less vibrant than the flowers. You can also just leave the background a solid color if you want. You can use a gradation/ombre from light to dark in the background. Play around. Look at examples the next time you go shopping for greeting cards. Look at examples online.

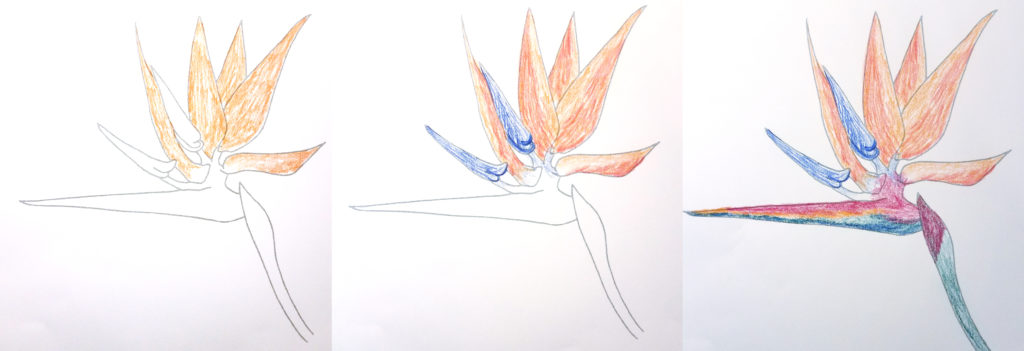
Color. This is the fun part! Personally, I like to find an online photo of the flower and use that as my guide. These flowers have a few different species which have some color variations. Since the color is really makes this flowers recognizable as well as the unique shape of Bird of Paradise, I like to block in some of the same colors as in the photo. Later on, I’ll introduce different types of media for coloring (e.g. color pencil, water color paints, acrylic, pastel, etc.). For now, let’s keep it simple with either crayon or color pencils.

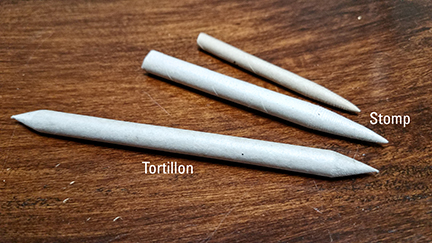
Example of blocking in color. My location lighting wasn’t great which is why the “paper” background color wasn’t consistent (took photos on cell phone’s camera). Just ignore the paper color. I was using colored pencils to lay down layers of color. Afterwards you an “smudge” them to blend the colors in better.

References

Posted on

Faber-Castell Gelatos

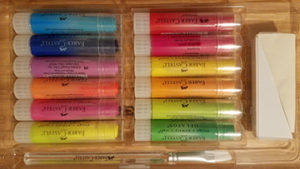
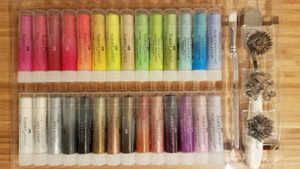
Faber-Castell Gelatos are a form of water-soluble paint (watercolor) in a lipstick-like tube. Each tube is soft and creamy (just like lipstick) when applied to paper. If your paper has texture (like the watercolor paper I used in this demo), the texture will pickup/grab the creamy application making it more challenging to get a smooth-looking application. If you want a smoother application, choose a paper with less texture. You can also cut of part of the paint from the tube and put that sample in a welled palette (e.g. bowl, or any other container) and add water to create your own color. You can layer colors like working with pastels.

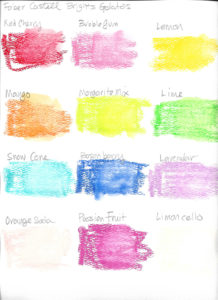
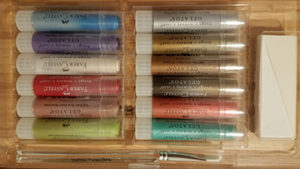
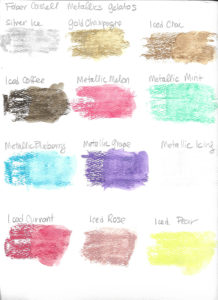
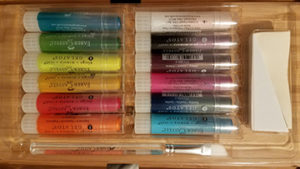
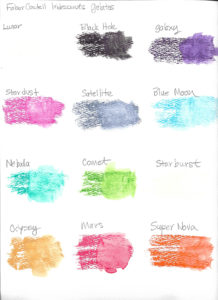
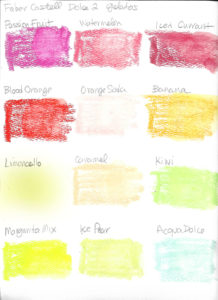
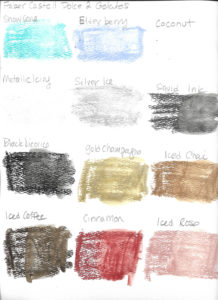
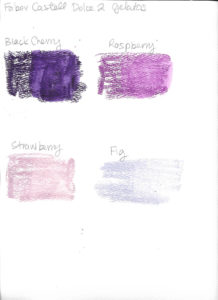
The Gelatos sets sampled were Brights, Iridescents, Metallics, and Dolce-2. Be sure to check the end of this post where you can click on the thumbnails to bring up a larger picture of our sample swatches.

The Gelatos Brights set contained the following paint sticks: red cherry, bubble gum, lemon, mango, margarita mix, lime, snow cone, boysenberry, lavender, orange soda, passion fruit, and limoncello. The Brights set will not disappoint. They are well pigmented both when dry and when wet as shown in our demo swatches.

The Gelatos Metallics set contained the following paint sticks: silver ice, gold champagne, iced chai, iced coffee, metallic melon, metallic mint, metallic blueberry, metallic grape, metallic icing, iced currant, iced rose, and iced pear. The Metallics set is more iridescent than the Iridescents set (so I wouldn’t buy both Metallics and Iridescents sets). As a dry application, you can’t even see the metallic lustre but the pigmentation is good. When wet, you get more of an iridescent sheen, but the colors look very washed out and very transparent.

The Gelatos Iridescents set contained the following paint sticks: lunar, black hole, galaxy, stardust, satellite, blue moon, nebula, comet, starburst, odyssy, mars, super nova. Starburst and super nova look like the Brights set’s orange soda and limoncello. The lack of iridescence is very disappointing–doesn’t show up in either dry or wet application. Save your money–don’t buy the Iridescent Gelatos.

The Dolce-2 set contained the following paint sticks: fig, strawberry, raspberry, black cherry, aqua dolce, iced pear, margarita mix, kiwi, caramel, limoncello, banana, orange soda, blood orange, iced currant, watermelon, passion fruit, iced rose, cinnamon, iced coffee, iced chai, gold champagne, black licorice, squid ink, silver ice, metallic icing, coconut, elderberry, and snow cone. The Dolce-2 set suffered the same aforementioned problems. In a dry application, they do ok. However, in a wet application the colors are very inconsistent and get washed out, becoming more transparent than anything.

The quality of these paint sticks varies. I think these are fine for kids–a lot of fun experimenting different uses. If you are a serious crafter or artist, I would take a pass on these as the quality is disappointing overall. I’m also unsure of the lightfastness of these paints. With the transparency problems, I don’t think the colors will hold well over time.