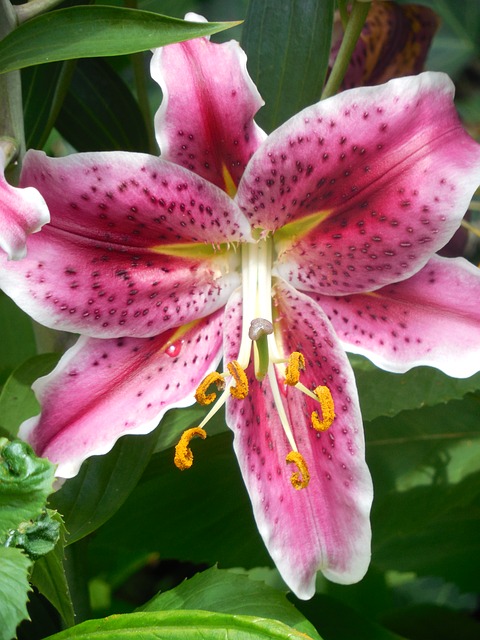
Members of the genus Lilium. are considered “true lilies”. Other flowering plants with “lily” in their name but not from the genus Lilium are not true lilies (daylilies, peace lilies, canna lilies, water lilies, toad lilies, and calla lilies). Butterflies are attracted to lilies, but these flowers are toxic for cats and dogs. Natural pests include the lily beetle and deer. Asiatic species have some amazing and very interesting colors plus distinctive markings like spots. The Oriental species are known for their strong fragrance. Longiflorum lilies are popular during Easter.
Find reference photos from the internet by searching: “true lily”; “asiatic lilies”; “oriental lilies”; “aurelian lilies”; “orienpet”; “LA hybrid”; “Turk’s cap”; “Canada lilies”; “Longiflorium lilies”; etc.
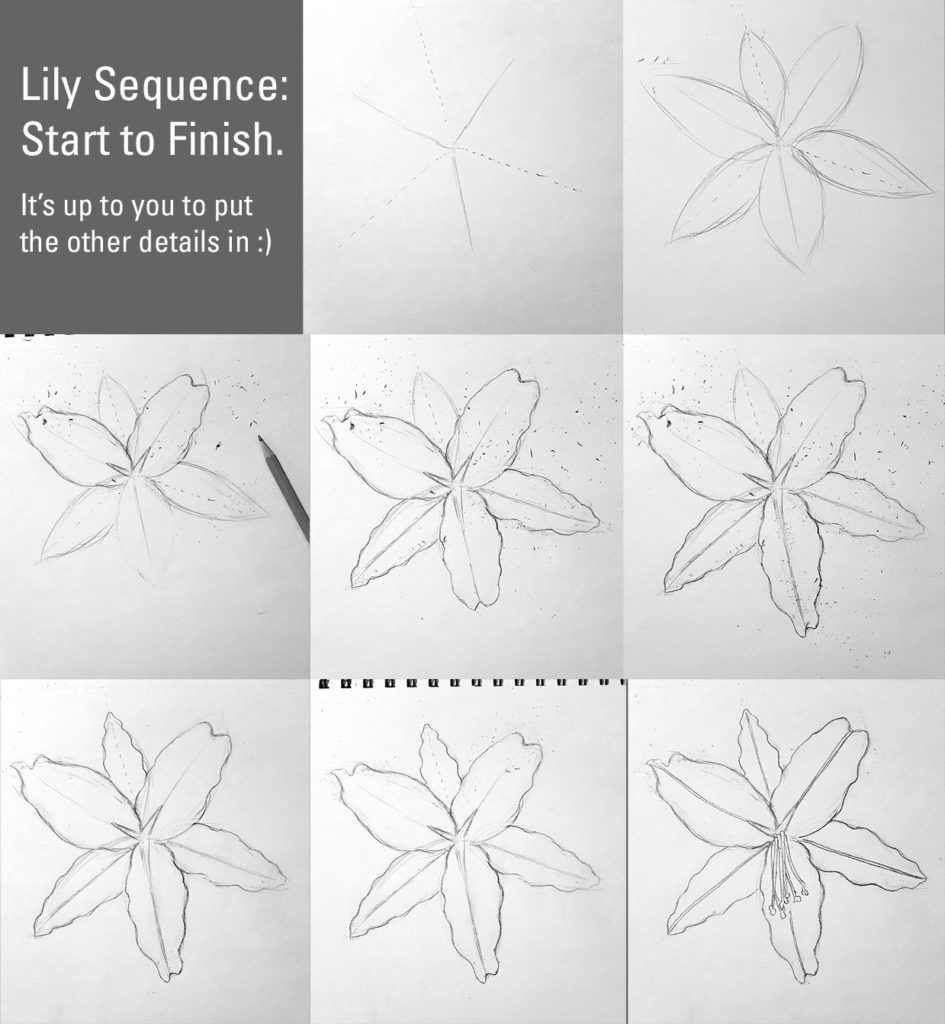
How to Begin Tip.
I am using the reference photo from Pixabay, https://pixabay.com/photos/asiatic-lily-lily-garden-plant-854963/ Be sure to look at lots of pictures on the internet! It’s really a blessing and such an awesome resource. Notice the patterns. Using your critical eye, notice the details, patterns, and basic geometrical shapes. Can you reduce the example below using geometric shapes? Notice the different shapes in relation to each other. Note the angle and perspective of the photo (e.g. a side view of the flower will look very different from it’s front view). There’s no real “trick” to drawing except to hone your eye–really fine tune your senses.
Have you seen our image transfer video? If not, watch it here. It will help you with transferring the images from the template into a design/arrangement that works for you!
Can you believe that there are approximately 679 species of Hibiscus? Wow! Hibiscus are tropical deciduous shrubs/trees that can grow as big as 15 feet tall with 6 inch diameter flowers. Typical flower colors range from yellow, orange, to red. Hummingbirds and butterflies are attracted to these flowers.
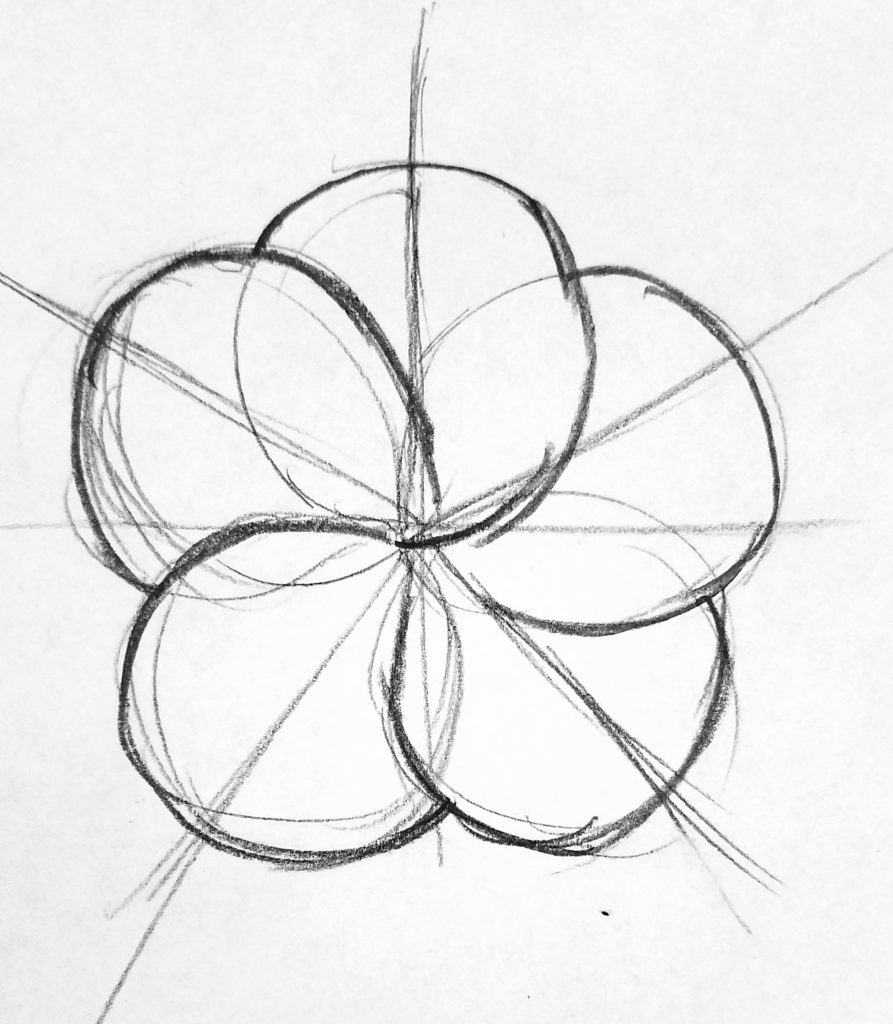
I looked at a lot of hibiscus flower pictures online because I find them so beautiful. When I begin, I try to simplify things. I noticed that they have 5 petals that are regularly spaced. If you draw a line down the middle of each petal, these “lines” would occur every 72 degrees–a circle has 360 degrees, and 360 / 5 = 72. Of course, we don’t have to be that exact. It is just useful to makes these types of observations. Then I just made a quick sketch trying to capture the basic shapes of the flower. If you look at a lot of hibiscus pictures on the Internet, you’ll notice special characteristics of different species. Start with the basic shape, and then modify it from there! Below is my quick sketch. I’ve left my construction lines (guide lines) in so that you can see.
Rough sketch with construction lines.
Download these free PDF templates (free for personal use; please do not resell or repackage for sale).
Have you seen our image transfer video? If not, watch it here. It will help you with transferring the images from the template into a design/arrangement that works for you!
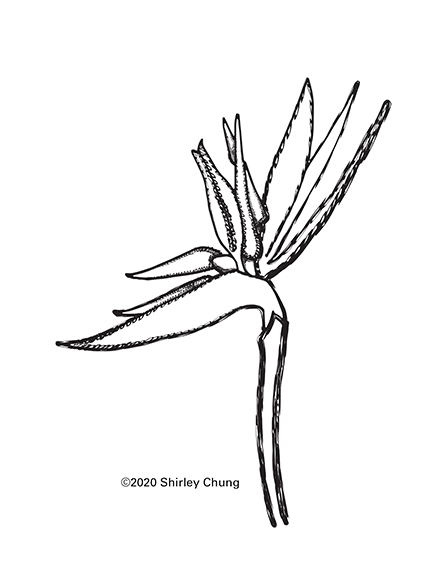
Bird of Paradise (Plantae, Magnoliophyta, Liliopsida, Zingiberales, Strelitziaceae, Strelitzia).
One of the most beautiful and exotic flowering (late winter to early spring) tropical plants is the Bird of Paradise (BP), Strelitzia. There are different varieties such as the orange BP (Strelitzia reginae) and white BP (Strelitzia nicolai). Interestingly, BP is a relative to the banana plant. The BP plant grow a lot larger than most photographs show–leaves 12-18 inches which emerge from the soil (trunkless) and around 5-7 feet tall (plan for at least 8’x8′ diameter of space). You can start these plants indoors, and move them outside if needed. They like at least 6-7 hours of bright sun, heat and humidity (moist well-drained soil, not waterlogged) of a tropical climate. It takes 4-5 years for the plants to mature (keep it contained, root-drained) before they will flower–an exquisite display! This is a rhizome plant and as it ages you can divide the rhizome to repopulate. However, if you divide the rhizome, it could set back the flowering (because it will take energy for them to reestablish themselves in a new pot). Definitely see some of the references and videos.
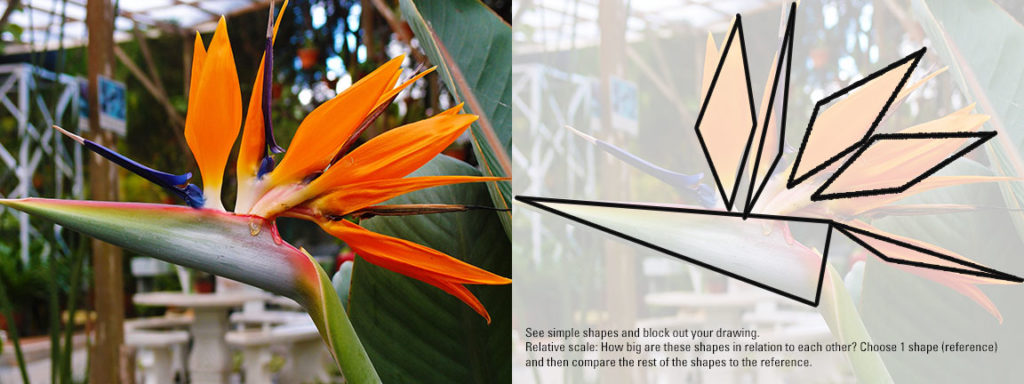
Block in shapes. Look at what you want to draw. Can you simplify it into basic shapes? Pick one of your shapes to be the reference. How big/small are the other shape in relation to the reference? That will guide you in your drawing. When you start drawing your shapes, use a pencil and a light touch. Don’t go too dark in case you want to erase later.
Download these free PDF templates (free for personal use; please do not resell or repackage for sale).
Transferring the template images. In the following video, I’m going to show you how to make your own transfer paper (you can also buy transfer paper in the stores called carbon or carbonless transfer paper). Remember that when you’re experimenting, use a lighter touch with your pencil. That way, if you want to change something, you can do so more easily.
Scale & Composition. Experiment with different sizes of the templates and try arranging them yourself. You can print the PDF’s smaller by adjusting the PDF/Printer Settings (those are specific to your computer setup).
Line. Be creative with your “outlines”. All the lines do NOT have to be perfect. Try a brush ink marker, or a marker that has a chisel tip (tip can make a thin line and a wide line depending on how you hold it). You can even use darker pencil lines and make it look “doodley” like this example below. There are no rules!!
Example of “doodlely lines”.
Borders. Do you ever pay attention to all those greeting cards in stores? Sometimes, a nice border brings in the composition. Experiment with different borders, different thicknesses, different shapes (e.g. rectangular, oval), and creative lines. You may use different free online draw/paint programs and make some super creative borders with leaves.
Background. Experiment with the background. Do not make the background more detailed than the foreground (flowers), because you don’t want to take the focus away from the flowers. Don’t make the background colors too contrasty. Try subtle different shades of green, blue, or perhaps a muted/duller color that is less vibrant than the flowers. You can also just leave the background a solid color if you want. You can use a gradation/ombre from light to dark in the background. Play around. Look at examples the next time you go shopping for greeting cards. Look at examples online.
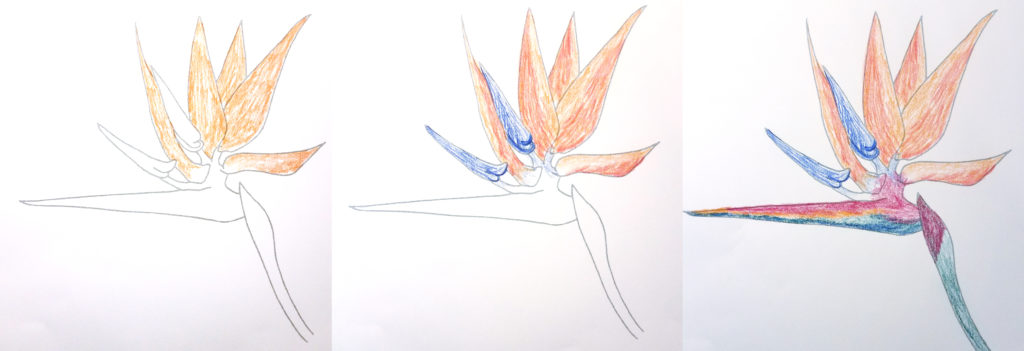
Color. This is the fun part! Personally, I like to find an online photo of the flower and use that as my guide. These flowers have a few different species which have some color variations. Since the color is really makes this flowers recognizable as well as the unique shape of Bird of Paradise, I like to block in some of the same colors as in the photo. Later on, I’ll introduce different types of media for coloring (e.g. color pencil, water color paints, acrylic, pastel, etc.). For now, let’s keep it simple with either crayon or color pencils.
Example of blocking in color. My location lighting wasn’t great which is why the “paper” background color wasn’t consistent (took photos on cell phone’s camera). Just ignore the paper color. I was using colored pencils to lay down layers of color. Afterwards you an “smudge” them to blend the colors in better.